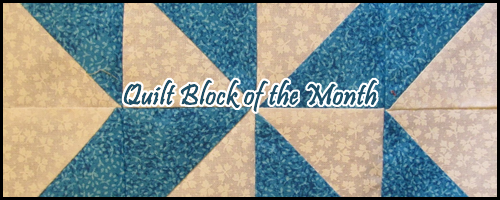
Quilt Block of the Month - April 2018
Author: Elanda Tonil, March 2018
April’s Quilt Block of the Month is a Path and Stiles block.
If you look at it you’ll see that, at its heart, it’s really just a Nine Patch, which is our Four Patch expanded by one. Inside that Nine Patch we have three types of interior blocks. The simplest being a plain square at the center. You should also recognize four Split Rail Fence pieces.
The last four are two triangles forming a square. This might be the most common technique in all of quilting and is called a Half-Square Triangle. Since we already know how to make the Split Rail Fence I will focus on the Half-Square Triangle. If you struggle with any of it, let me know! I am more than happy to help!
- Tips
- Keep your slightly smaller dark square separate from your larger ones, they’re close enough in size to be confusing.
- When sewing your Half-Square Triangle, make sure your seams don’t both curve in at the seam time, this could leave you without enough of a seam allowance, leading your block to come apart.
- I recommend not using a ¼” foot when piecing your Half-Square Triangles together. The ¼” foot will pull on it, making it harder to sew straight as well as potentially pulling it out of shape. Since you’re sewing diagonally across the fabric it’s already prone to distortion.
- If you want a little more wiggle room in the Half-Square Triangles, cut the 4 7/8” squares a little bigger and just trim off the extra in Step 5.
- Dark Fabric
- 1 square measuring – 4 ½” x 4 ½”
- 2 squares measuring – 4 7/8” x 4 7/8” (four and seven eighths inches)
- 1 strip measuring – 1 7/8” x at least 18” (at least 18” long, I was happy having a little wiggle room)
- Light Fabric
- 2 squares measuring – 4 7/8” x 4 7/8”
- 2 strips measuring – 1 7/8” x at least 18”
- Step 1
Pin and piece your split rail fence-style pieces just as we did in February.
- Step 2
Cut your new strip into 4 squares, each measuring 4 ½” x 4 ½”. Make sure you use your center seams to judge squareness while you trim these, not the edges. The color changes will determine if your block looks straight or crooked, so make sure your color changes are crisp.
Go ahead and lay them out with your 4 ½” x 4 ½” dark square, you’re already almost done!
- Step 3
Now we’re starting on the Half-Square Triangles.
With your preferred instrument, draw down the center of your squares, either the light or dark, whichever you prefer.
Pin them together, right sides together. You will not be sewing on this line. You will be sewing two seams, each ¼” offset from this line, so make sure your pins aren’t blocking those lines.
- Step 4
Sew down one side of the line, then the other. Each should have ¼” seam allowance from the center line. It always feels backwards to me, but you’ll line it up so the line is following the path the edge of your fabric usually takes.
Use your rotary cutter to cut your triangles apart on your drawn line. Press the seams to the dark fabric.
- Step 5
Notice the bit of extra fabric from your seam allowance hanging past your squares. You don’t, strictly speaking, have to cut this off, but I highly recommend it. It is easy for it to throw off your future seam straightness so I always trim.
You should also square up each of these, using your new diagonal line as your guide. Since your seam goes diagonally across the fabric, there’s a good chance there’s some slight stretching so I would say squaring up is almost essential. I always square up here. If you have a ruler with the 45° line drawn, just line that up with your center seam. If you don’t have the line, just line up the intersections of your grid in the same line.
- Step 6
Lay out all your pieces and figure out the orientation you want it all to have. Feel free to play around and try new things.
Once you’re happy with it, you will again sew this together in rows. So the top three will be sewn together, the middle three will be sewn together, and the bottom three will be sewn together.
- Step 7
This will be your pickiest seam! Don’t feel shy about pinning the heck out of this, you want it to lay as even and flat as you can while the corners also match up!
Once you have your three rows, sew the rows together! I generally do as much pinning as I reasonably can at one time, so I pin both edges at the same time and sew one side, turn it around and sew the other.
Square up the block and you’re done!
Let me know how it goes! Also, if you have any questions send them my way! If you need copies of previous patterns, I can definitely send them to you, just send me a PM or leave a comment.
Happy Quilting!
